> ## Documentation Index
> Fetch the complete documentation index at: https://help.latchel.com/llms.txt
> Use this file to discover all available pages before exploring further.
# How to Add & Manage Residents
> If you do not use a system integration then you must update Latchel when adding new residents. You can also disable residents or add resident move-in/move-out dates. Follow the steps below on how to manage your residents!
### **How to Add New Residents**
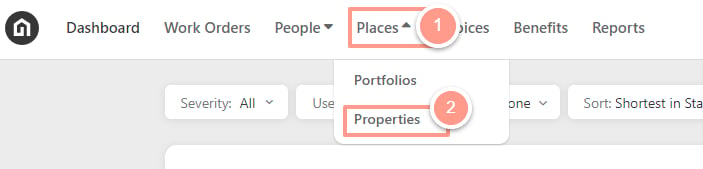
Click **Places** and on the dropdown select **Properties** from the top navigation menu.
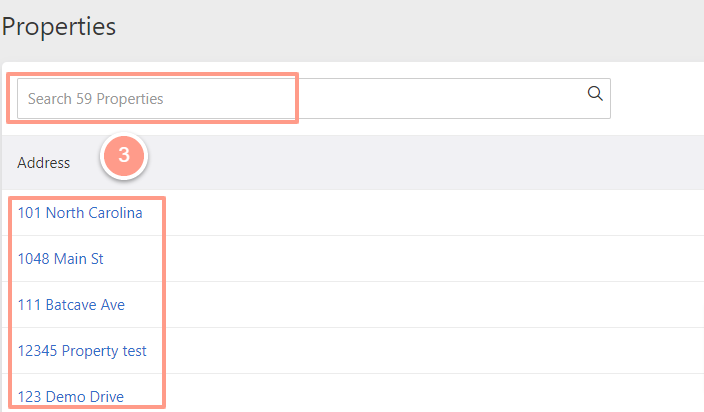
 **Search** or **select the property address** where the resident is located.
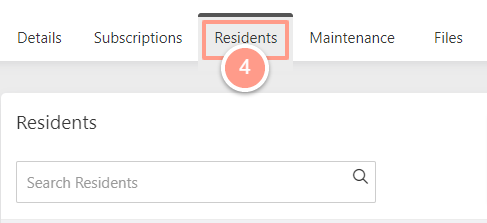
 From the property profile page, click on the **Residents** tab.
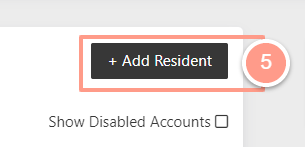
 To add a new resident, click the **+ Add Resident** button on the far right.
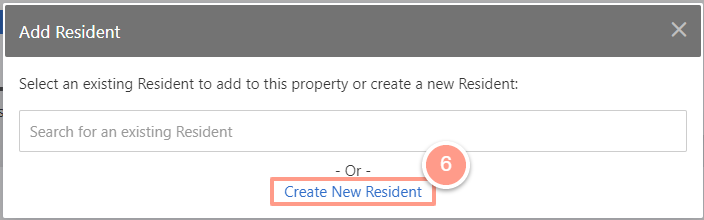
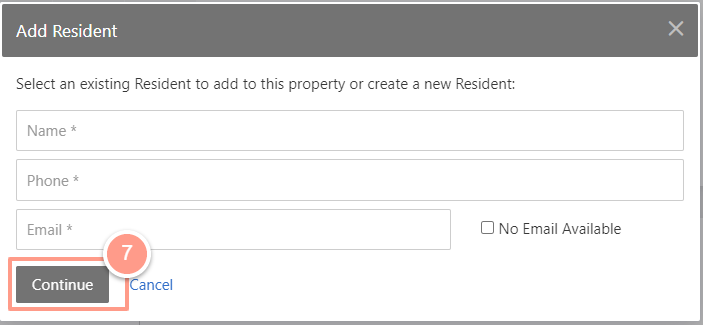
 Next, click **Create New Resident** then fill out the necessary information, and hit **Continue.**
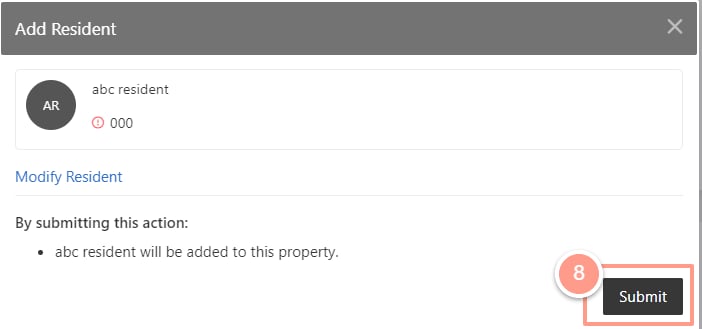
 Then click **Submit**. Repeat these steps to add multiple residents to a property profile.
 ### **How to Modify Resident Contact Information**
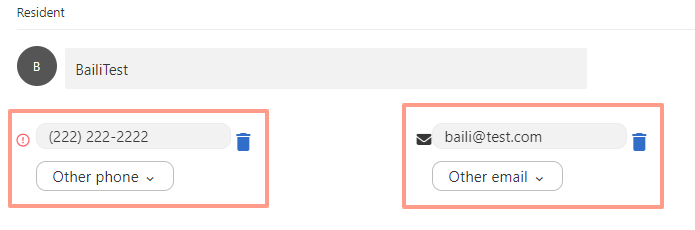
From the resident profile page, you can edit the resident’s primary phone number and email address. You can also add additional phone numbers and email addresses.
Please note that additional numbers and addresses are only used as a reference.
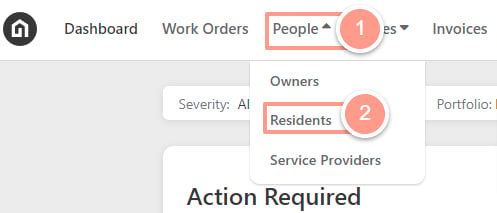
Click the **People** tab from the top navigation menu and select **Residents** from the dropdown.
### **How to Modify Resident Contact Information**
From the resident profile page, you can edit the resident’s primary phone number and email address. You can also add additional phone numbers and email addresses.
Please note that additional numbers and addresses are only used as a reference.
Click the **People** tab from the top navigation menu and select **Residents** from the dropdown.
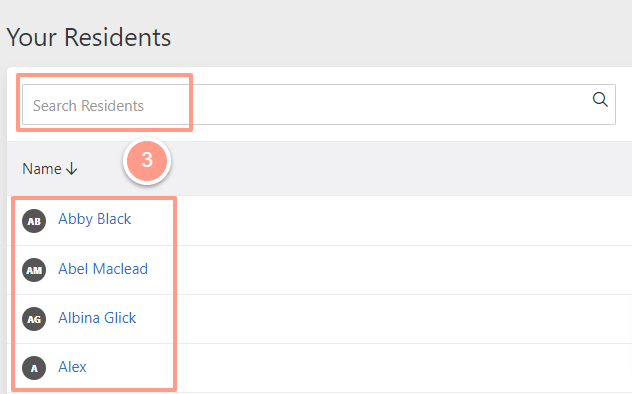
 Search and select the resident that you need to modify and you will be directed to the resident profile page.
 From here, you can edit the resident’s contact information.
 ### **How to Add Resident's Move-in and Move-out Dates**
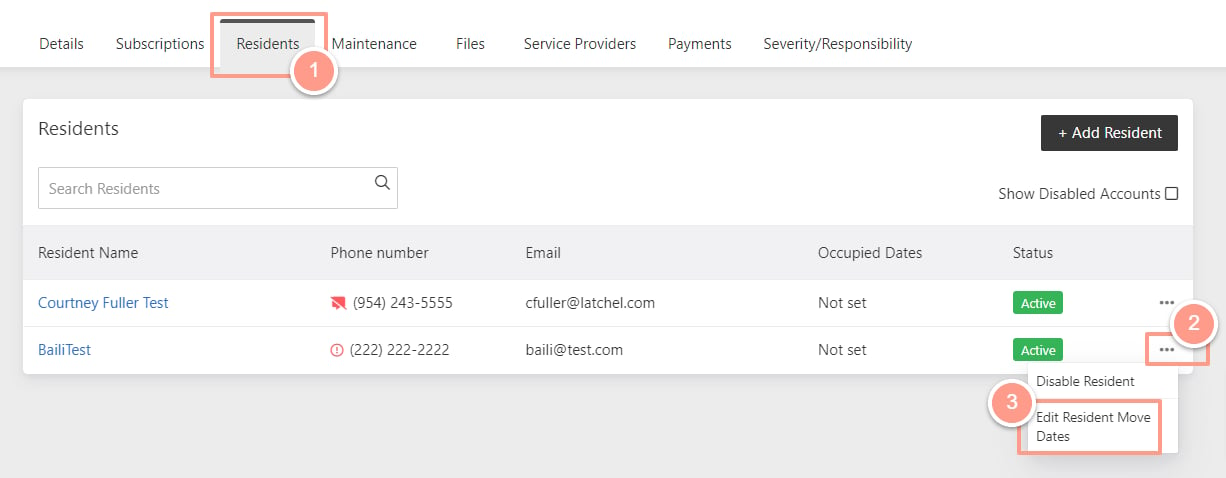
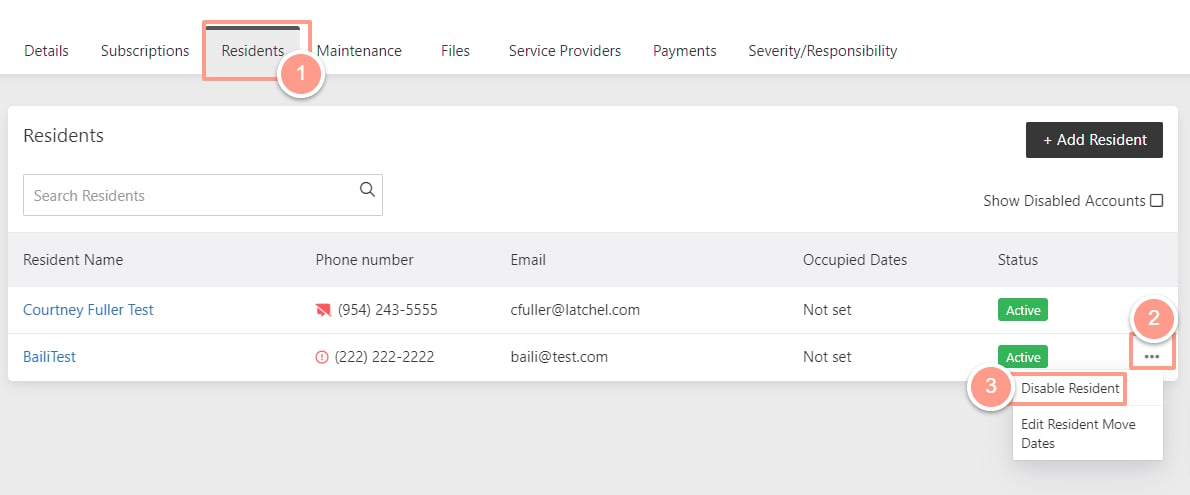
In the property page under the **Residents tab**, click the **ellipsis icon** on the right side of the resident and select **Edit Resident Move Dates**.
### **How to Add Resident's Move-in and Move-out Dates**
In the property page under the **Residents tab**, click the **ellipsis icon** on the right side of the resident and select **Edit Resident Move Dates**.
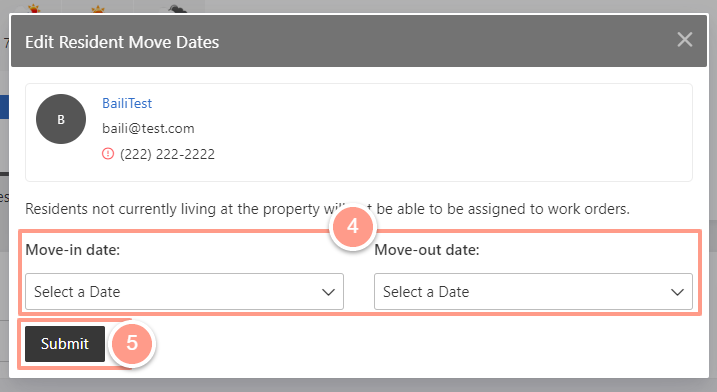
 Now input the date either **Move-in** or **Move-out**, then click **Submit**.
 Moving out a resident does not mean that the resident's profile will be disabled.
### **How to Disable a Resident Profile**
Property Managers can disable residents from the **Property page** and from the **Resident's page**.
From the property page under the **Residents tab**, click the **ellipsis icon** on the right side of the resident and select **Disable Resident**.
Moving out a resident does not mean that the resident's profile will be disabled.
### **How to Disable a Resident Profile**
Property Managers can disable residents from the **Property page** and from the **Resident's page**.
From the property page under the **Residents tab**, click the **ellipsis icon** on the right side of the resident and select **Disable Resident**.
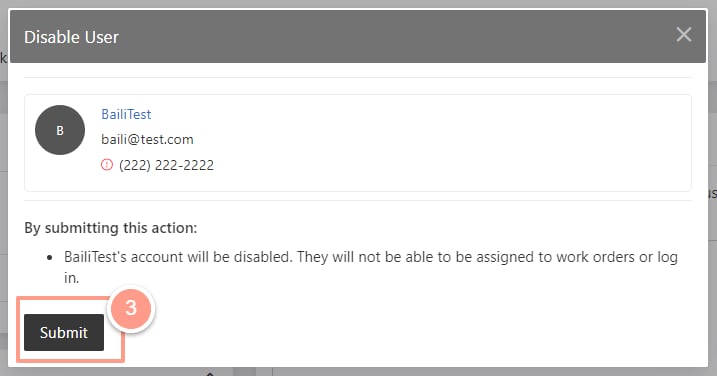
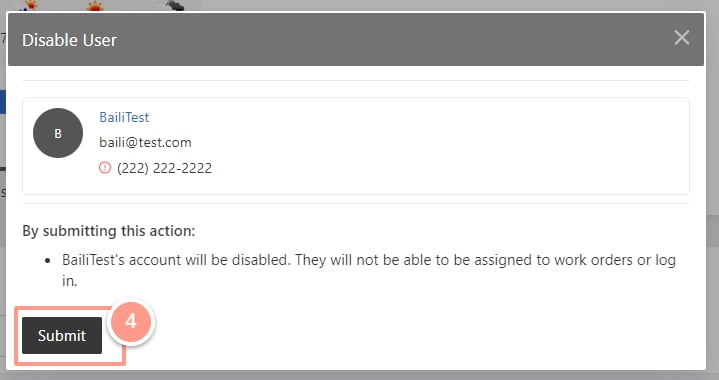
 Then select **Submit**.
 From the **Resident's page** click the **ellipsis icon** on the right side of the page, and select **Disable Account**.
 Then select **Submit**.