> ## Documentation Index
> Fetch the complete documentation index at: https://help.latchel.com/llms.txt
> Use this file to discover all available pages before exploring further.
# How to Create New Resident Benefit
> Custom resident benefits let you tailor your offerings to match your property’s unique services. This guide walks you through the steps to create and publish a new benefit on your Resident Benefits Dashboard.
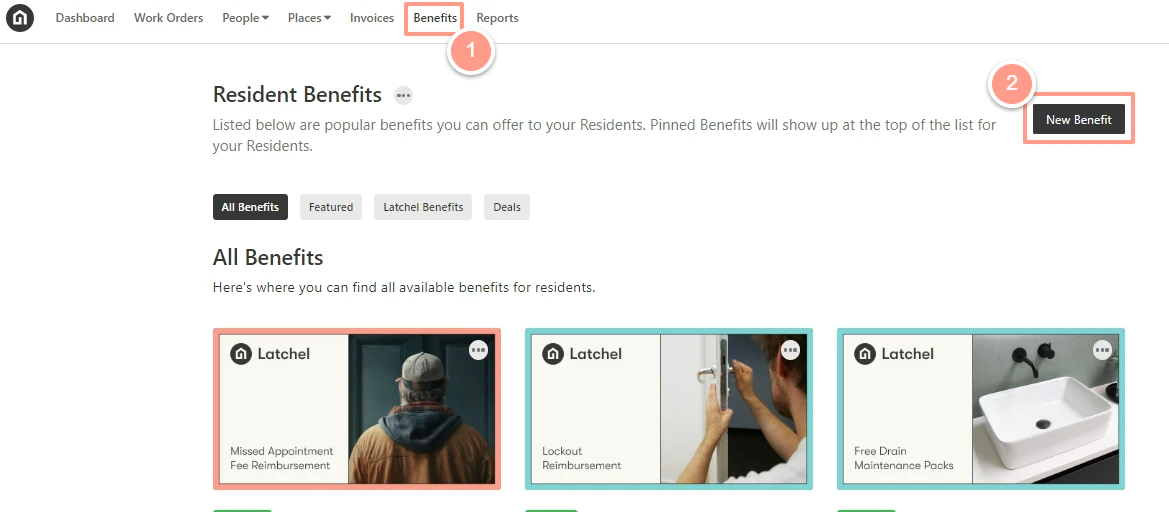
Go to the **Benefits** from your dashboard, then click **New Benefits**.
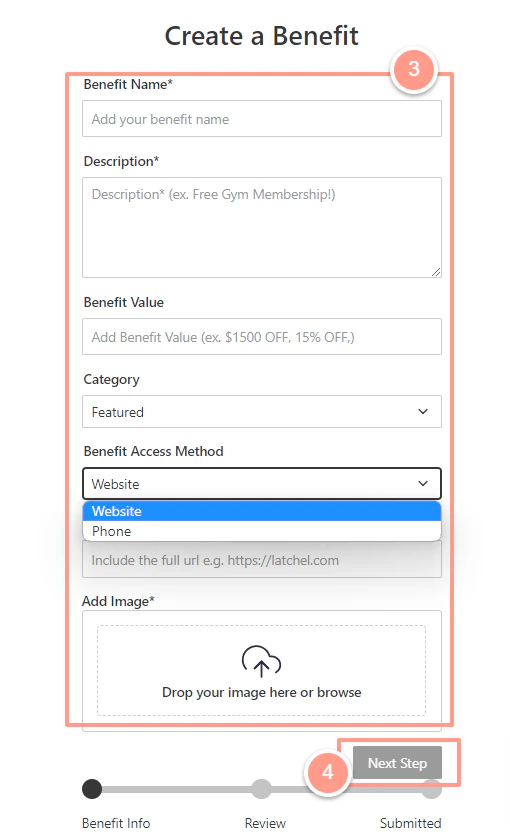
 On the **Create a Benefit** page, provide all the necessary information about the new benefit as follows. Click **Next Step** once done.
* **Benefit Name** - the name of the Resident Benefit
* **Description** - provide a brief description of the new benefit
* **Benefit Value** - add a value, for example, \$1500 or 15% OFF
* **Category** - you may choose between **Featured** or **Deal**
* **Benefit Access Method** - select an access method either a **website** or **phone number** of the resident benefit information
* **Add Image** - upload an image. This can be a company logo or the name of the benefit.
On the **Create a Benefit** page, provide all the necessary information about the new benefit as follows. Click **Next Step** once done.
* **Benefit Name** - the name of the Resident Benefit
* **Description** - provide a brief description of the new benefit
* **Benefit Value** - add a value, for example, \$1500 or 15% OFF
* **Category** - you may choose between **Featured** or **Deal**
* **Benefit Access Method** - select an access method either a **website** or **phone number** of the resident benefit information
* **Add Image** - upload an image. This can be a company logo or the name of the benefit.
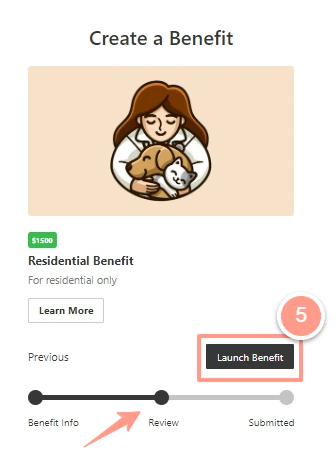
 Review the new resident benefit, then click **Launch Benefit** if all information is correct.
You may click **Previous** if you wish to go back to the previous page and edit some information.
Review the new resident benefit, then click **Launch Benefit** if all information is correct.
You may click **Previous** if you wish to go back to the previous page and edit some information.
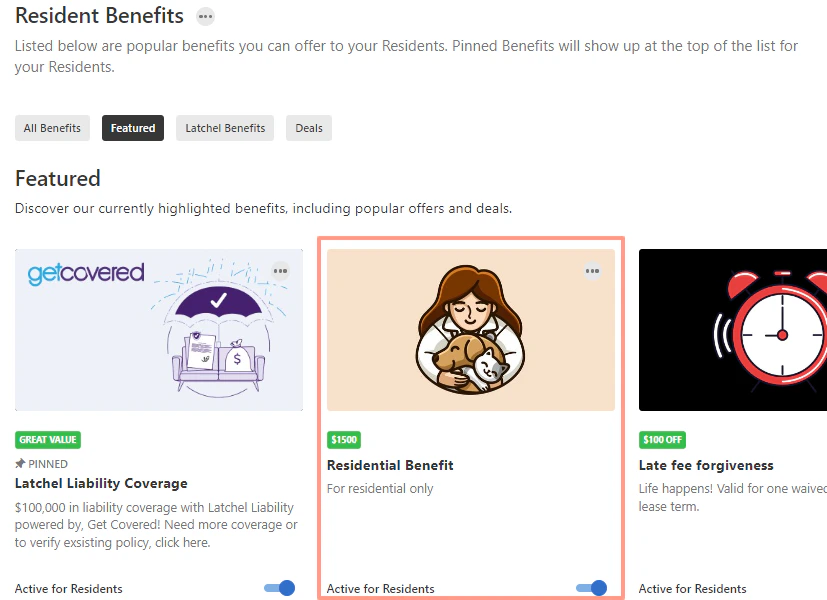
 Once the benefit is launched, it will be part of the active benefit on your Resident Benefit hub.
 And that’s how you create your custom Resident Benefit. Now it’s time to announce it to your residents!
Need steps to instruct your residents on how to access their resident benefits? Check [Accessing Your Resident Benefits](/s/topic/0TO5e000000h9wrGAA/Accessing-Your-Resident-Benefits-Hub).
And that’s how you create your custom Resident Benefit. Now it’s time to announce it to your residents!
Need steps to instruct your residents on how to access their resident benefits? Check [Accessing Your Resident Benefits](/s/topic/0TO5e000000h9wrGAA/Accessing-Your-Resident-Benefits-Hub).