Add New Company User
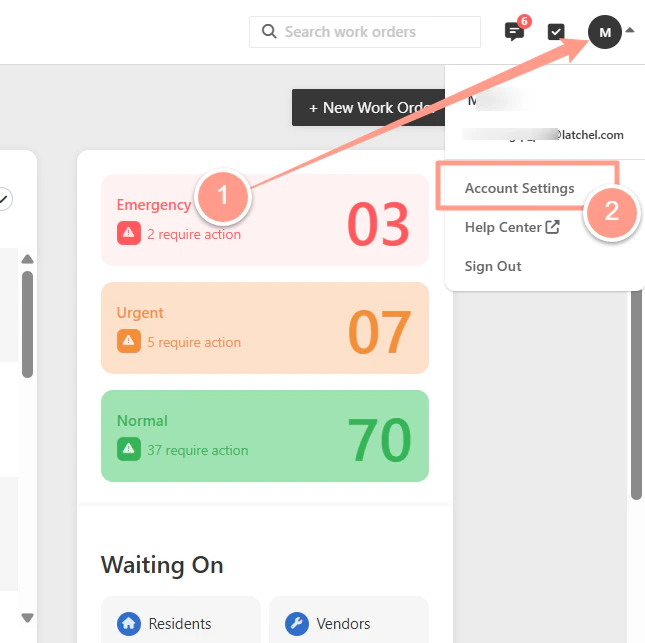
After you logged in to Latchel, click the arrow down beside your user icon at the top right corner of your dashboard. Then, click Account Settings.
From the Account Settings page, go to the Users tab. Then, click the +New User button at the top right.
From the small window that shows on the page, enter the new company user’s information. Click Save once done.
The name of the new user is required, while the phone number and email address are optional. However, providing the new user’s contact information is highly recommended for seamless communication.
Remove Existing Company User
From you Account Settings, go to Users tab.
In the list of the Company Users, look for the name you need to remove/disable. Then, click the 3 dots across the name of the user to be removed/disabled.
Next, choose Disable User.
Finally, click Submit to confirm the action you’ve taken. You’ll notice a note User Account Disabled under the user’s name upon submission.
And that’s how you can add and remove/disable a company user!