
As of the June 2026 release, “User Groups” have been renamed to “Teams” throughout the Latchel platform. The steps, button labels, and screenshots below still reflect the previous “User Group” naming — the underlying functionality is unchanged, but you may see “Team” or “Teams” in place of “User Group” in your account.
Configuring Teams at the Company Level
Configuration Inheritance (Property, Portfolio, & Company Level)
See how settings at the company, portfolio, and property levels pass down, and how to override them.
Open Account Settings
Click on the drop-down at the top right-hand side of your screen. Select Account Settings from the menu.
Click the Teams tab
From the Account Settings page, click the Teams tab.
Click New Team
On the right-hand side of your page, click New Team.
Name the team and save
Type in a name for your Team and clickSave.
Click Add user to team
On the far right-hand side of your screen, click the ellipsis () and then Add user to team.
Add a user and submit
Search for an existing user on your account or create a new user. Click Submit to save.
Click the Details tab
To set the Team to receive all of Latchel’s email notifications on the Company Level, click the Details tab.
Select the default notification group
Under the Maint. Communication Settings, click the dropdown under the Default Notification User Group field and select the User Group. Click Save.If you don’t see the User Groups you need to refresh the page so they get populated.
Configuring a User Group (Portfolio Level)
The User Group at the Portfolio Level will automatically be applied to all properties within that portfolio.
To learn more about configuration inheritance and how a single property can override Portfolio and company-level configurations, see the guide below.
To learn more about configuration inheritance and how a single property can override Portfolio and company-level configurations, see the guide below.
Configuration Inheritance (Property, Portfolio, & Company Level)
See how settings at the company, portfolio, and property levels pass down, and how to override them.
Open the portfolio
Click the Places tab and then, click Portfolios. Then, search or select the portfolio that you want to edit.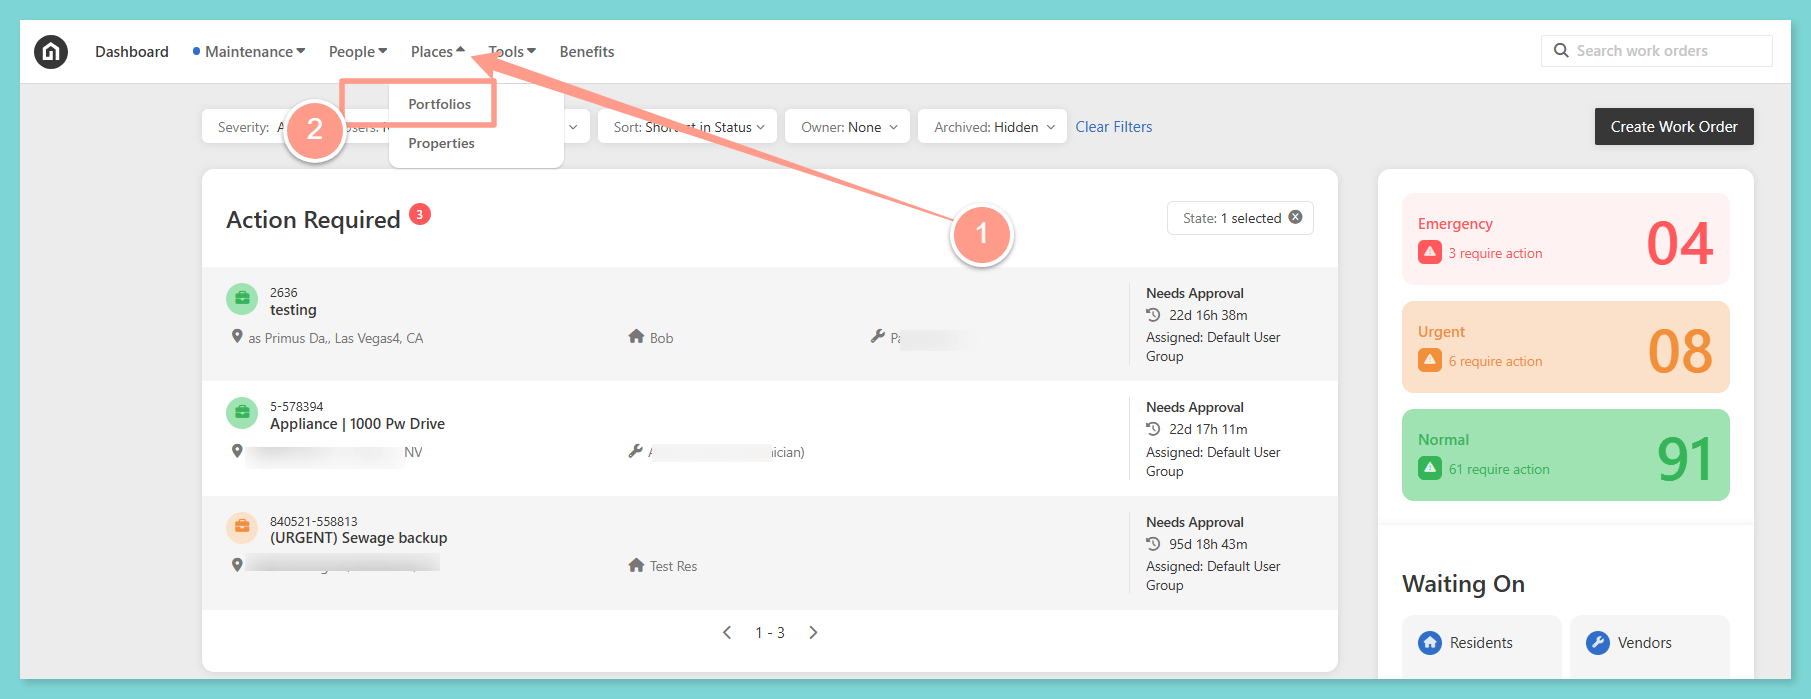
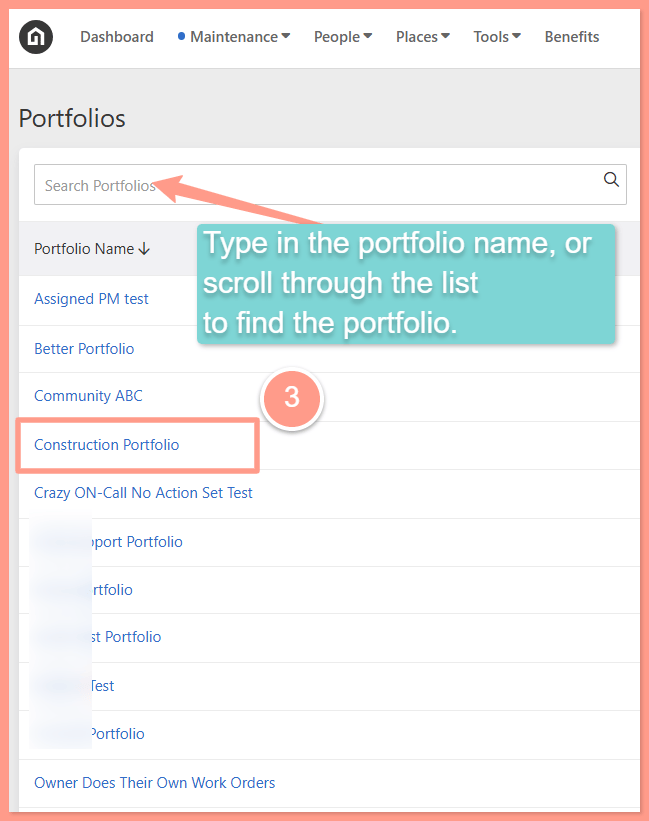
Scroll to Maint. Communication Settings
On the Details page, scroll down to the Maint. Communication Settings section.
Click Override
Once you expand the Maint. Communication Settings, click Override under the Default Notification User Group.
Select the User Group
From here, you will see the Company Level Notification User Group was automatically applied to the portfolio. To override the settings, select the User Group from the dropdown under the Default Notification User Group field. Click Save.
Configuring a User Group (Property Level)
Click Places then Properties
Click the Places tab and then, click Properties.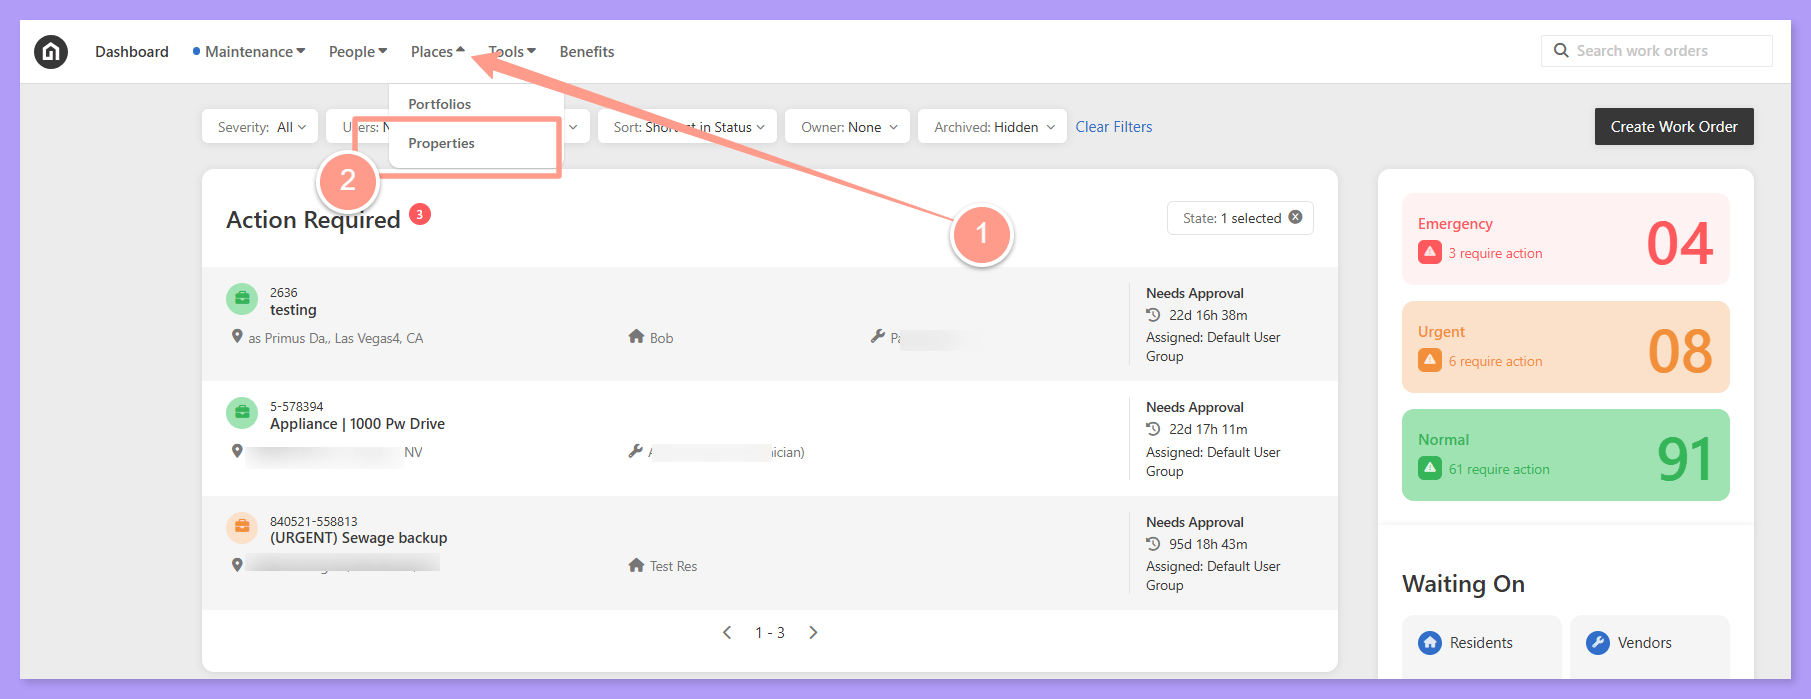
Select the property
Search or select the property address.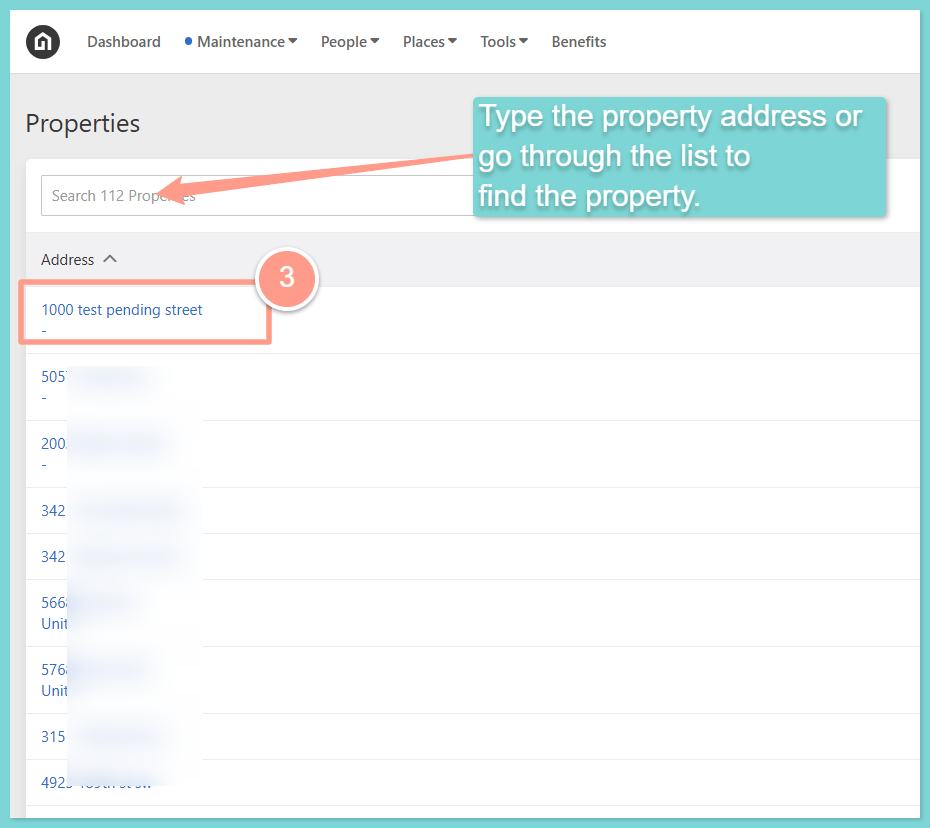
Click Override
On the Details page, scroll down to the Maint. Communication Settings. From here, you will see the property inherited from the Company Level User Group. To override this, click Override under Default Notification User Group.
Select the User Group and save
Then select the User Group dropdown under the Default Notification User Group field. Click Save.