How to Add Images and Files to a Work Order
Go to your resident dashboard
First, navigate to your resident dashboard by following the steps in the help guide:
Resident Dashboard Overview
Open your dashboard and see where each of your maintenance requests stands.
Select the work order
From your dashboard, select the work order where you need to add a file.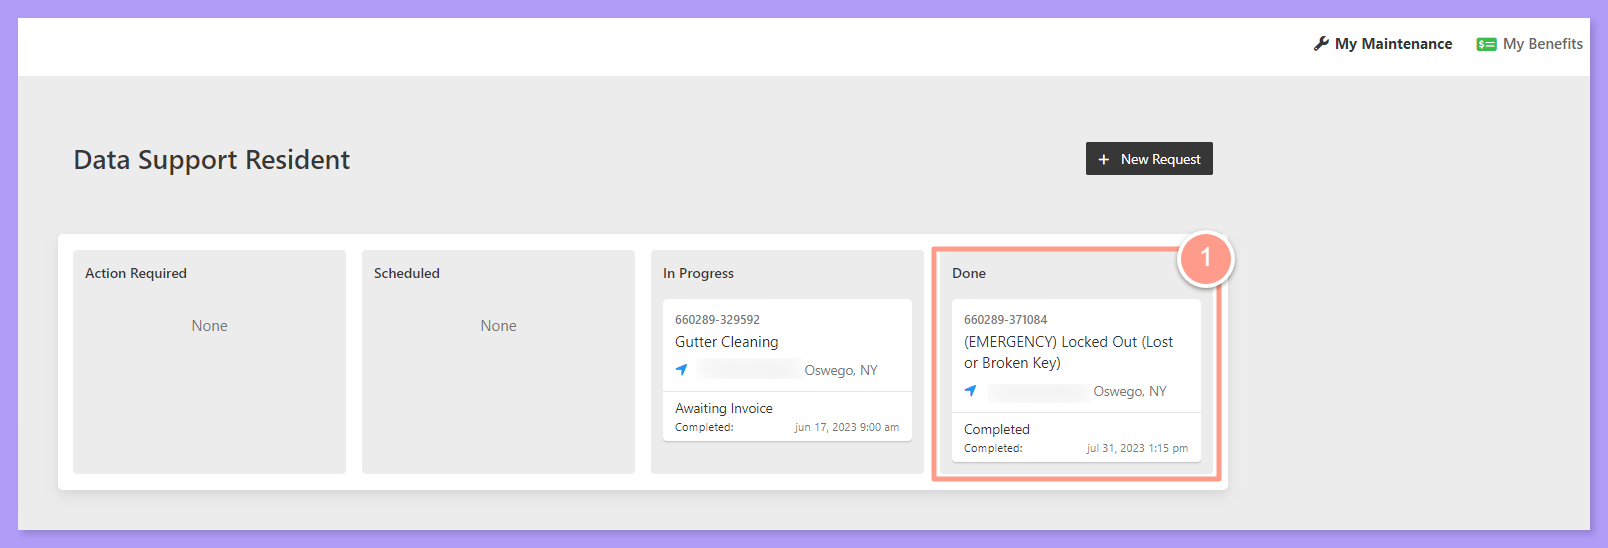
Click Provide Work Order Update
On the Work Order Details page, click Provide Work Order Update.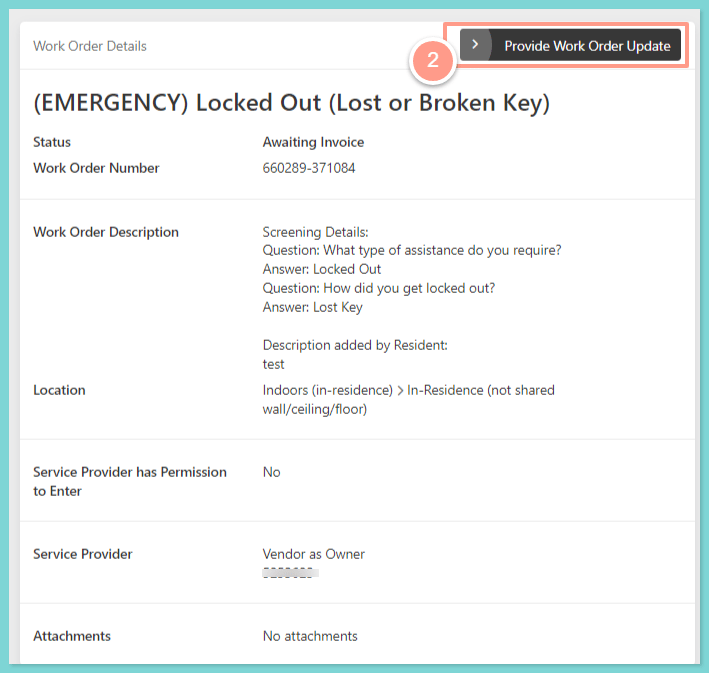
Select Add Images and Files
Then select Add Images and Files.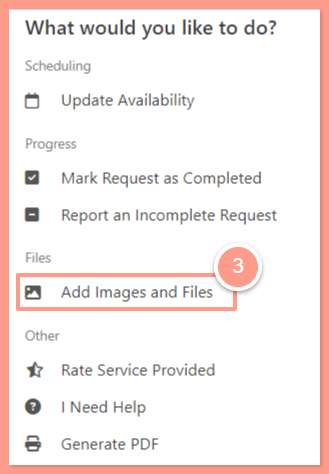
Click Choose Images/Files
Next, click Choose Images/Files. Depending on your computer’s settings, your drive folders will pop up on your screen.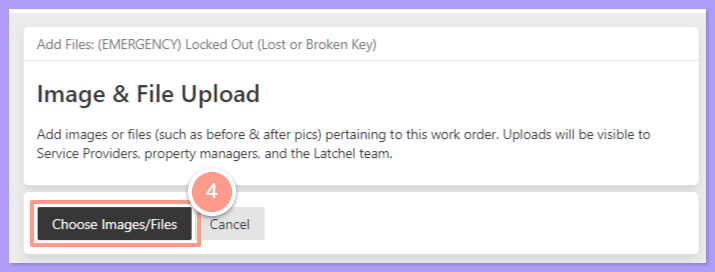
Select the file and click Open
Afterward, select the file or image that you want to upload from your computer to the work order. Click Open to upload the file.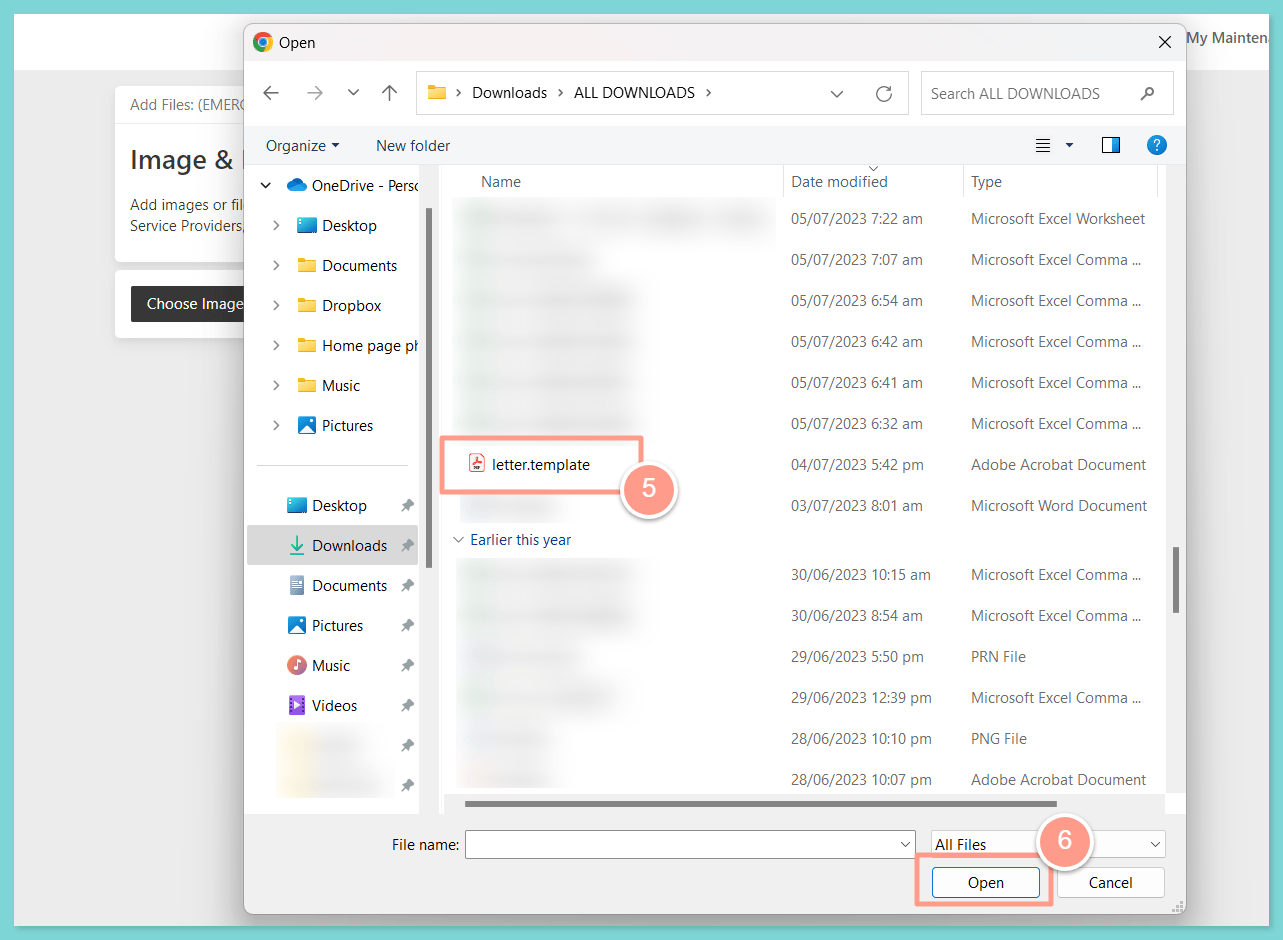
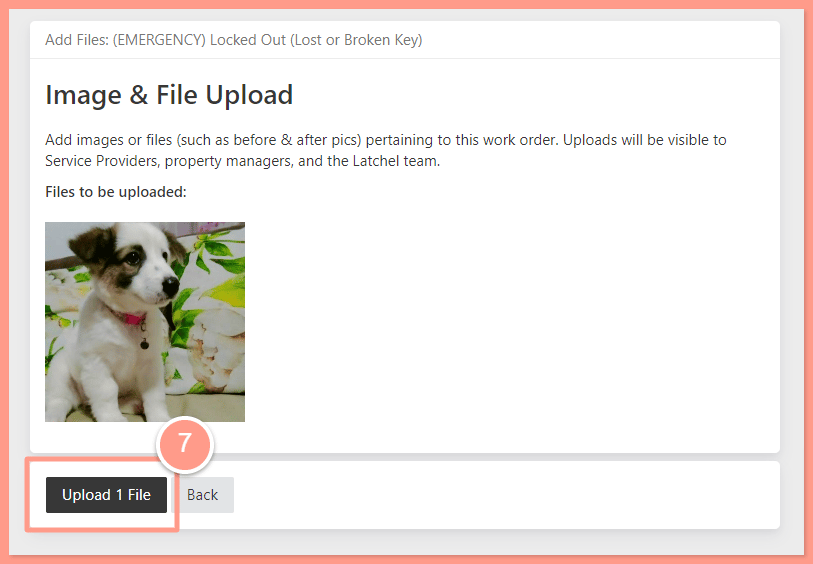
Click Upload File
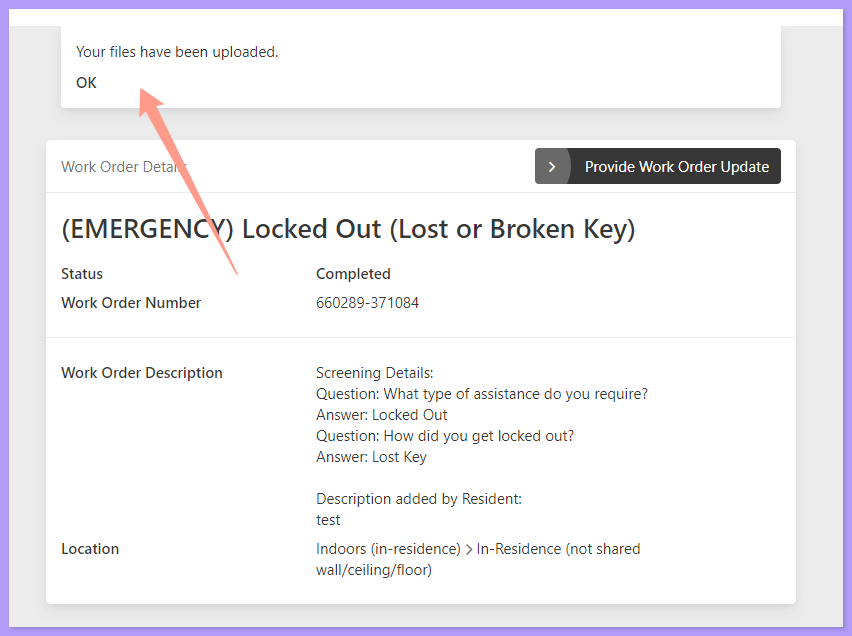
Finally, click Upload File to upload the images or files you’ve selected. A confirmation message at the top of the next page will show that the image/file is uploaded.