Severity and Responsibility Settings and It’s Effect in your Work Orders
When a job needs approval, it will go into the status:- Needs PM Approval (if you are on the Home Assistant or Premium plan)
- Otherwise, it will go to Forwarded to PM.
- Latchel will create a task for the assigned user group.
- When it is between 8 am - 7 pm (property time), Latchel will send a text to the user group.
- After 24 hours, Latchel will send a reminder email to the user group
How to Create User Groups
Set up user groups to better organize access and responsibilities across properties or portfolios.
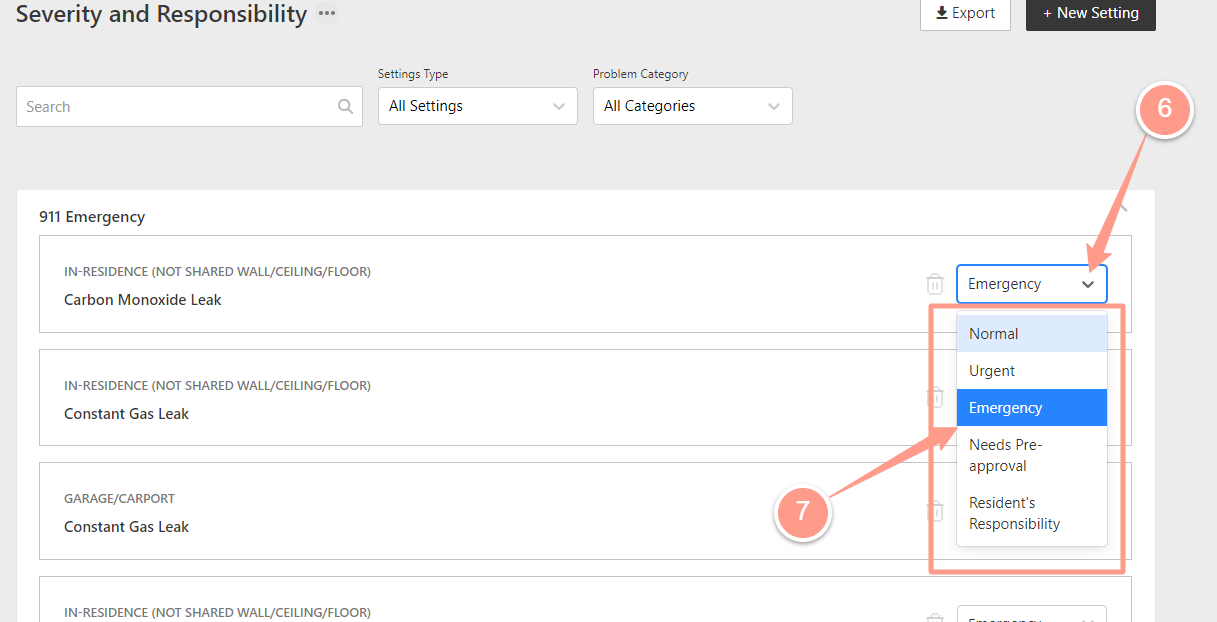
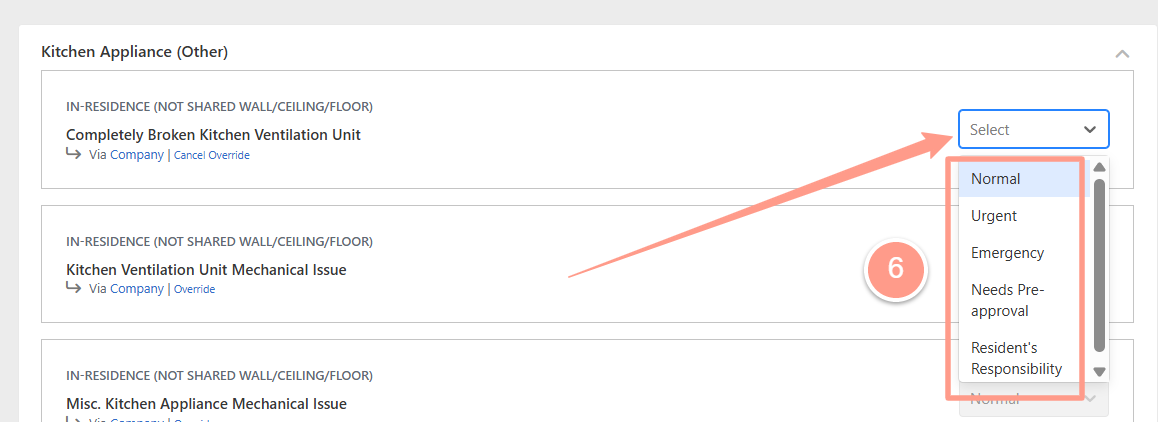
- Needs Pre-Approval: Approval of new non-emergency maintenance requests is required before Latchel dispatches a Service Provider
- Resident’s Responsibility (Home Assistant Plan Only): The tenant will be responsible for paying for this job. Latchel will coordinate these jobs and charge the resident through the Latchel portal if the resident is enrolled in the Home Assistant program
- Normal: Non-emergency
- Urgent: Scheduled in 72 hours
- Emergency: Dispatched immediately
How to Update Severity and Responsibility Settings
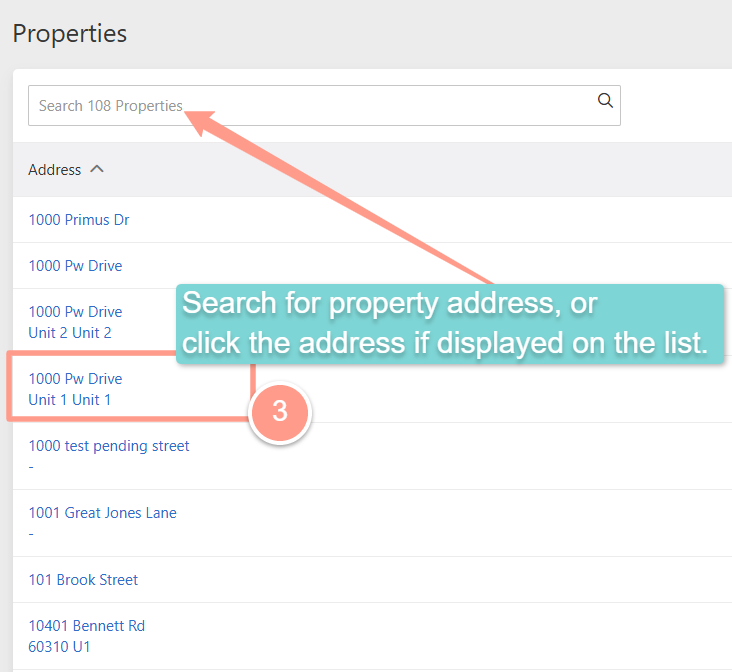
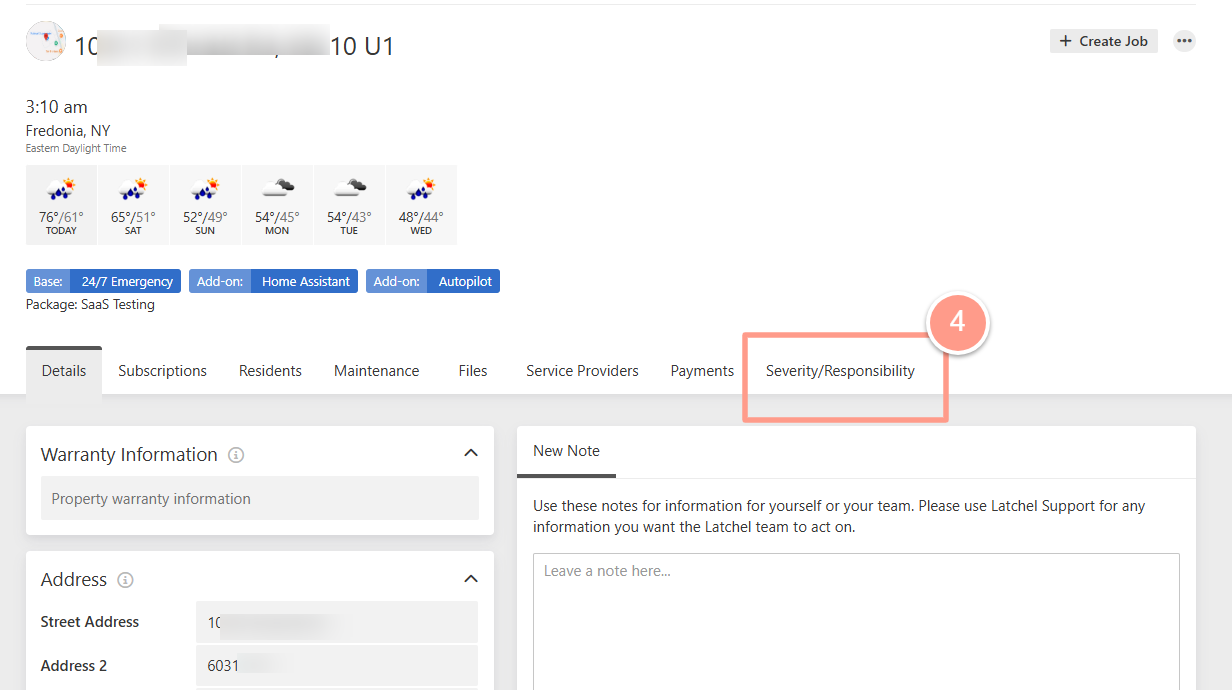
A. At the Company Level To modify your pre-approval, severity, and responsibility settings at the company level, click on the drop-down at the top right-hand side of your screen. Select Account Settings from the drop-down.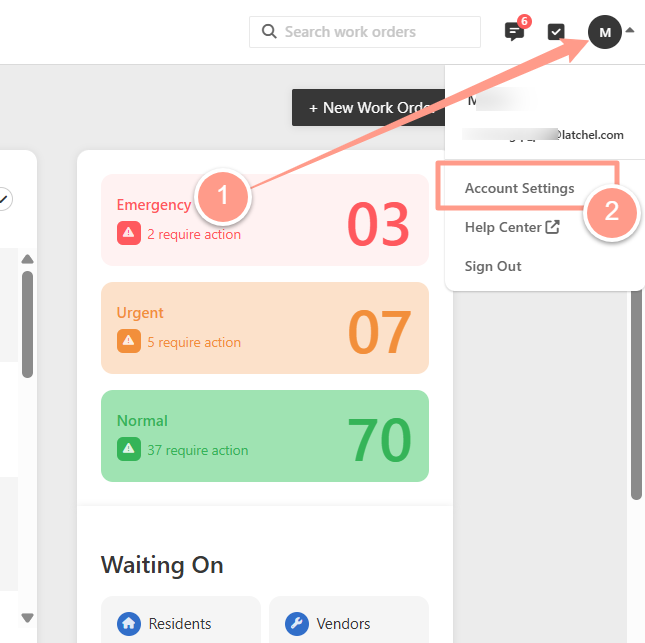
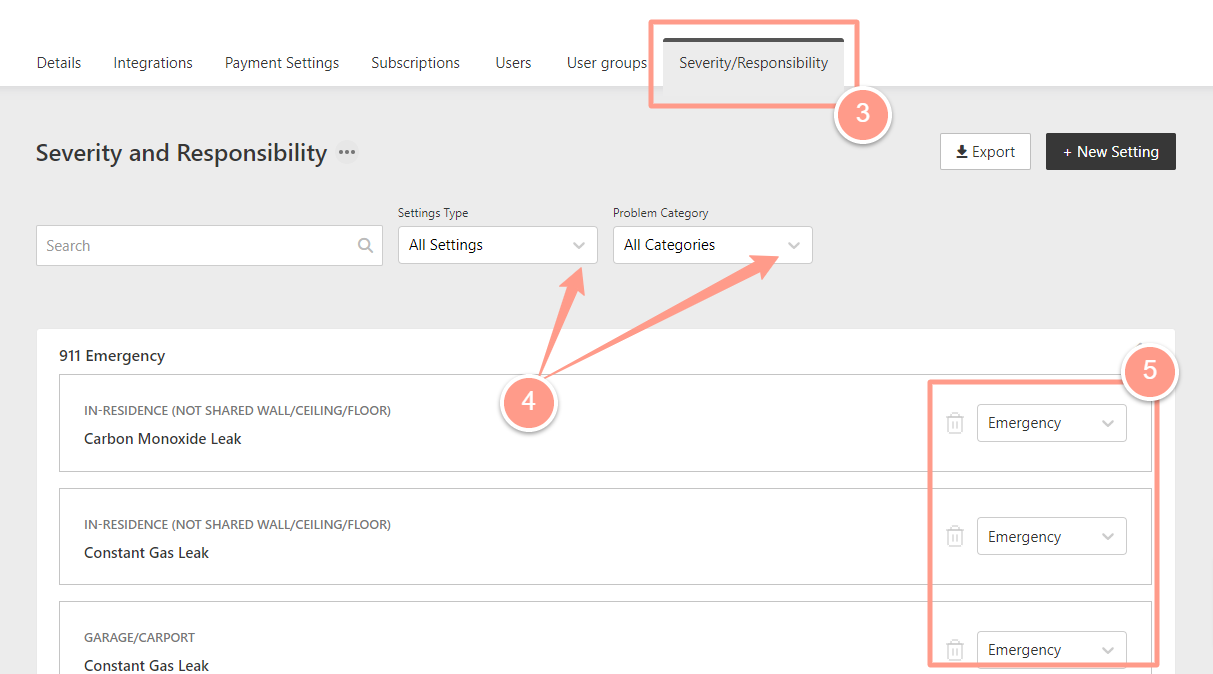
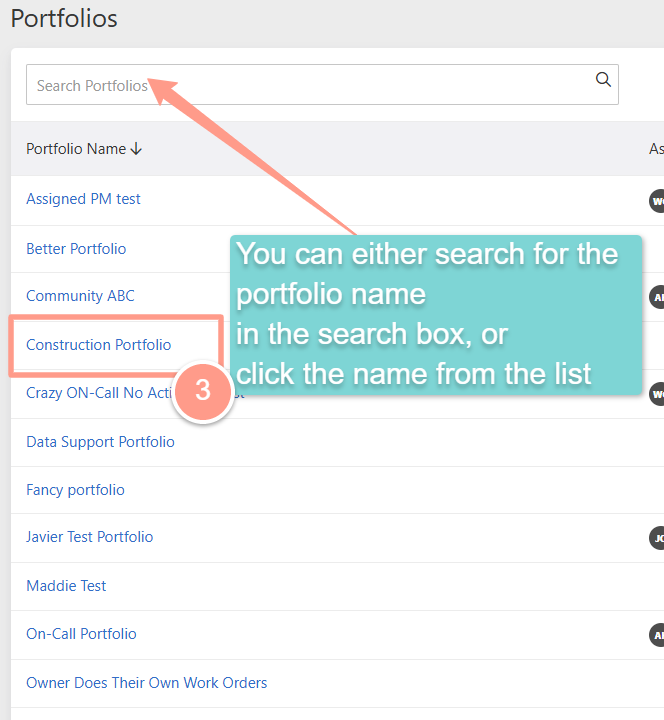
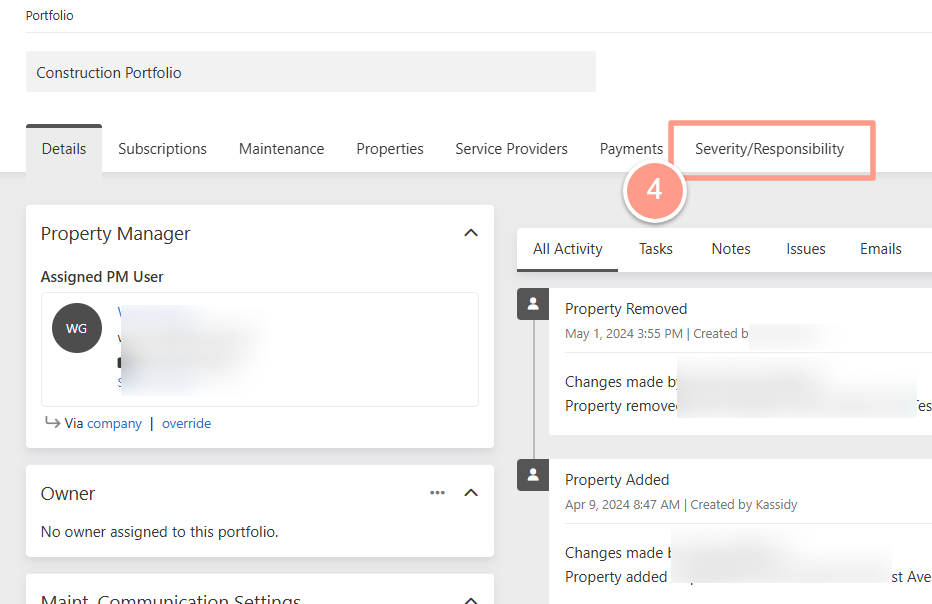
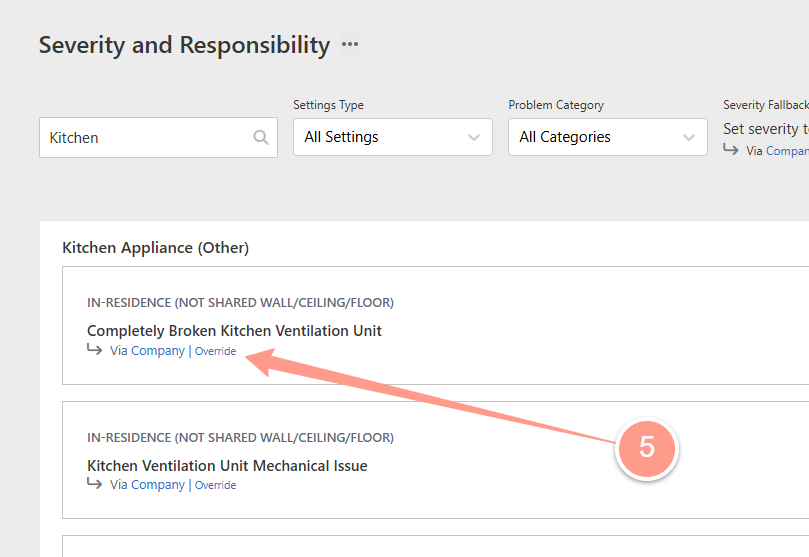
The settings at the Portfolio Level will automatically be applied to all properties within that portfolio. To learn more about configuration inheritance and how a single property can override Portfolio & Company level configurations, click here.




How to Save Existing Severity Responsibility Presets
You can save different severity-responsibility settings presets based on weather conditions, seasons, daylight variations, and expected emergencies. And also, to revert a previous settings if you are unsure of the changes you have made. Under the Severity/Responsibility tab, click the ellipsis icon and select Save as Settings Set.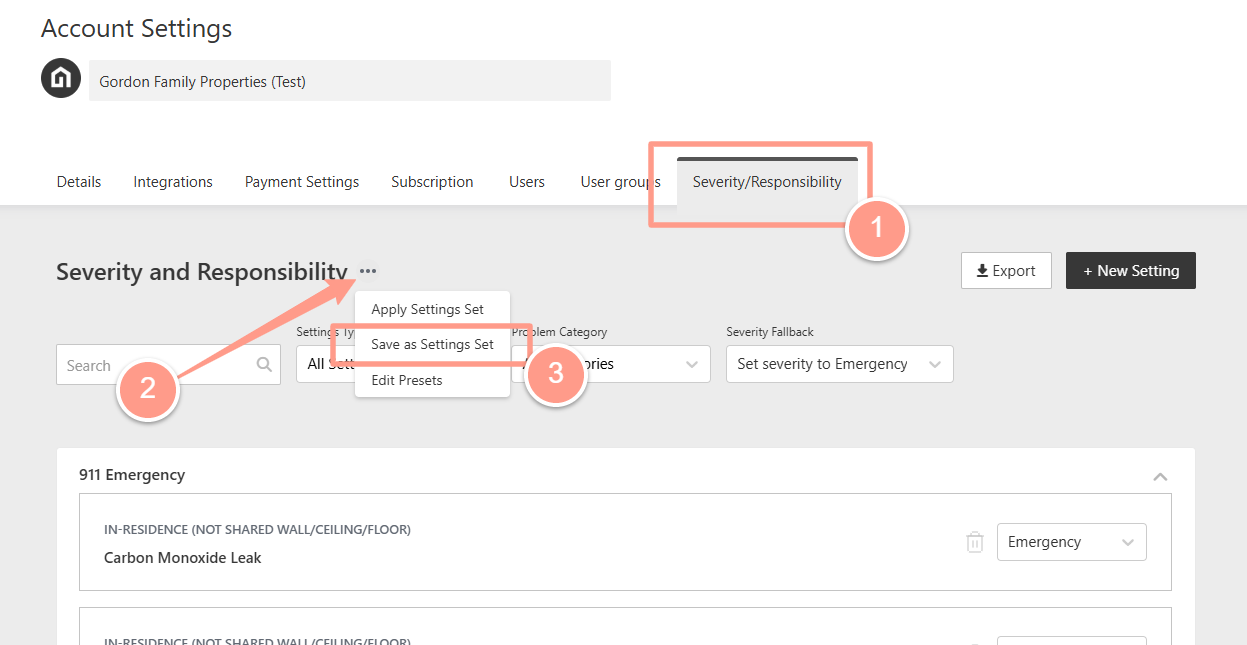
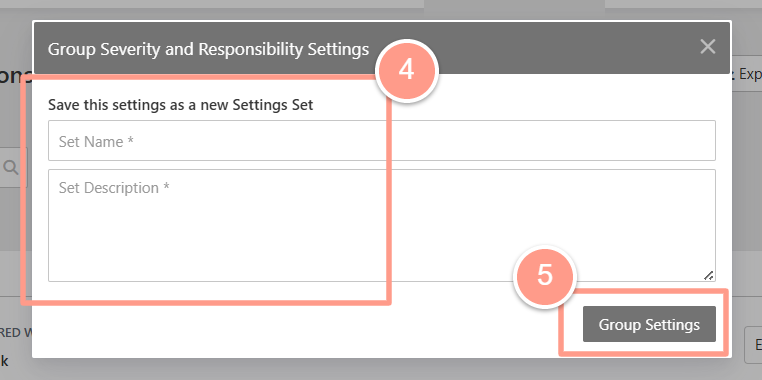
How to Apply Existing Severity and Responsibility Preset
Now that you have Severity settings saved, you can apply the settings at the property, portfolio, or company level. On the Severity/Responsibility tab, click the ellipsis icon and select Apply Settings Set.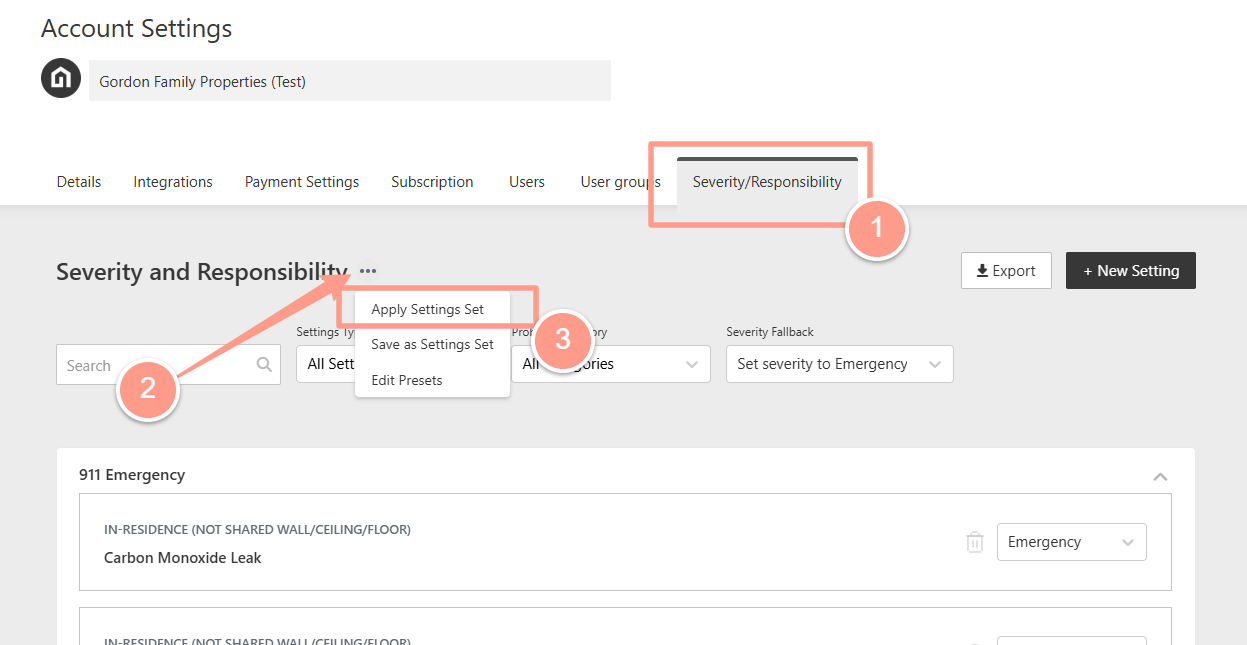

Any changes made to your severity and responsibility settings on your account settings page will only apply to future work orders. If you need to update existing work orders created prior to the change, you will need to modify them individually. For more information, refer to How to Change the Severity Settings on a Work Order.
How to Set a Severity Settings Fallback
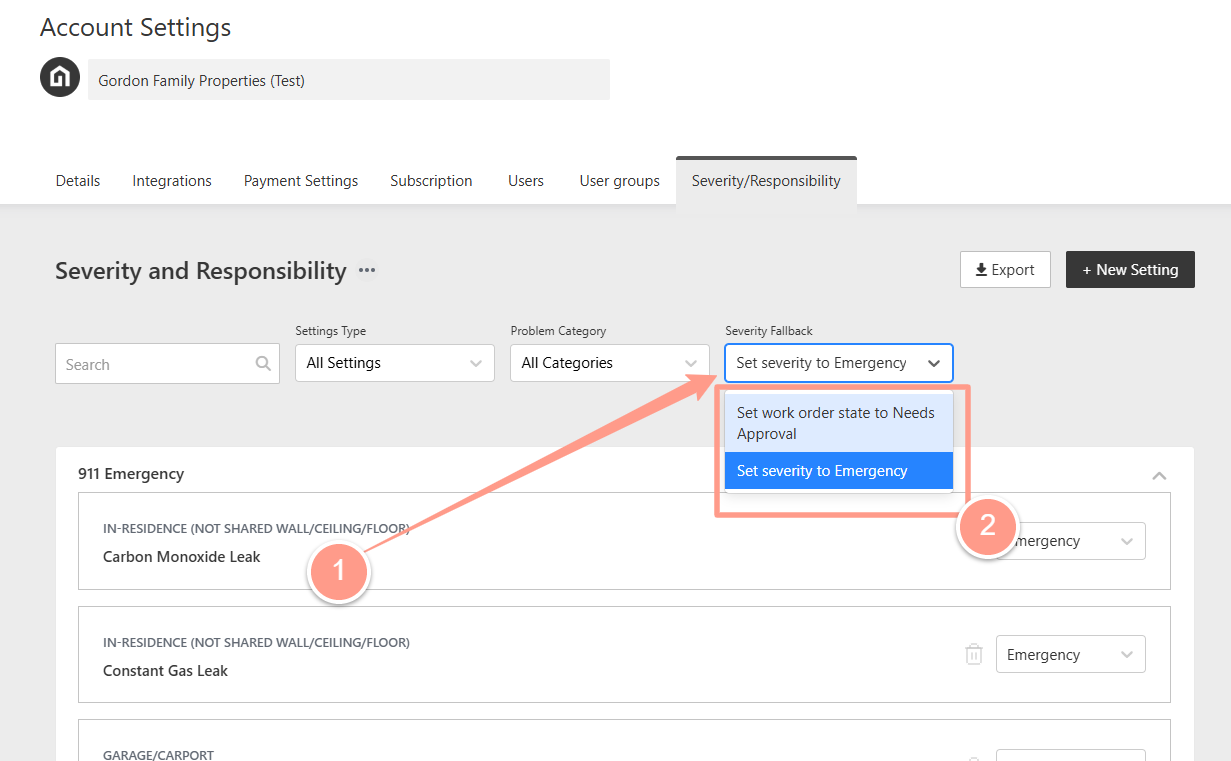
Severity Settings Fallback is used when a work order doesn’t match any existing preset. It allows you to set a default response for how Latchel should handle such cases. From your Severity and Responsibility page, click the dropdown arrow next to Severity Fallback and select either Needs Approval or Emergency.- If set to Needs Approval, all new work orders without a matching severity preset will notify the assigned property manager, and the work order will require their approval before proceeding.
- If set to Emergency, Latchel will automatically treat unmatched work orders as emergencies and take over handling them.
