There are two ways a property manager can create a work order after you log in to your **Latchel dashboard.

The first is within the dashboard, by clicking on +New Work Order.

The second is from the Maintenance dropdown select Work Orders, and click on Create Work Order.

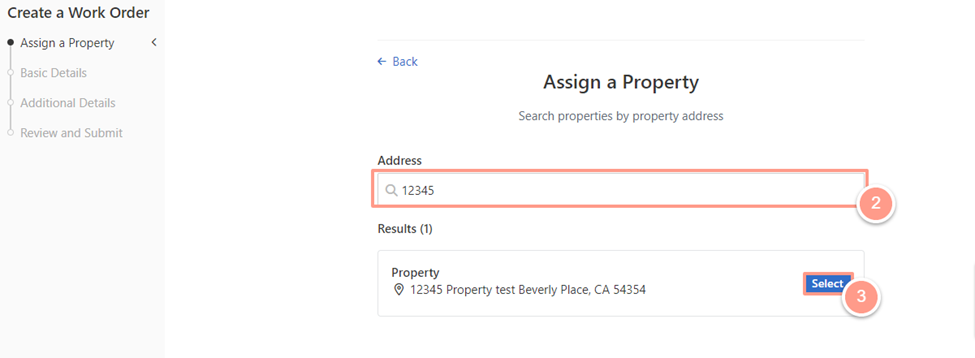
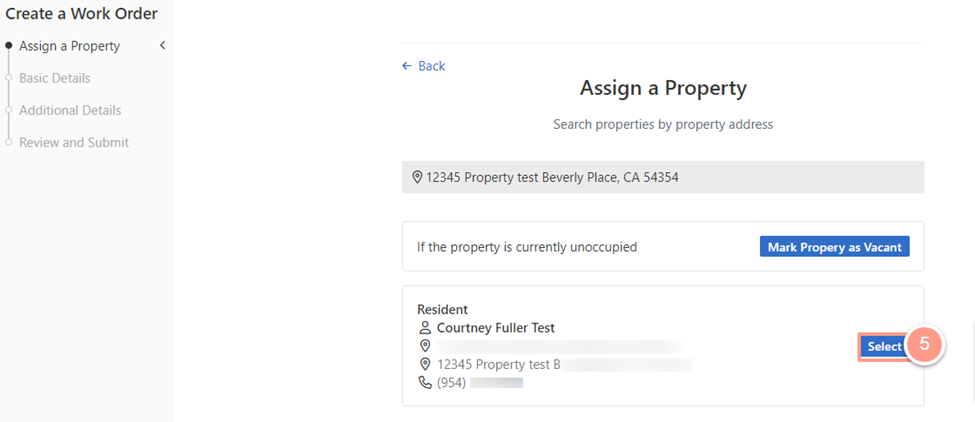
Whatever ways a property manager chooses, the functionality remains the same, it will start by Assign a Property. The search options are to Search by Resident Phone Number or Search by Property Address. For this help guide, Select the Property Address

On the Search bar, type in the address, and from the results, Select the address that requires the work order creation. 

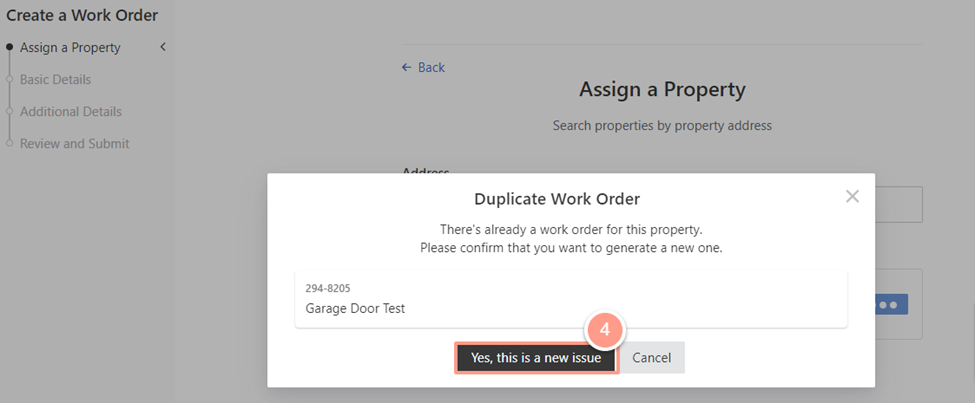
A pop-up box will appear advising of an existing work order and if the issue is different, click on Yes, this is a new issue.

Next is to either assign a resident or mark the property as vacant, for this help guide, Select the resident.

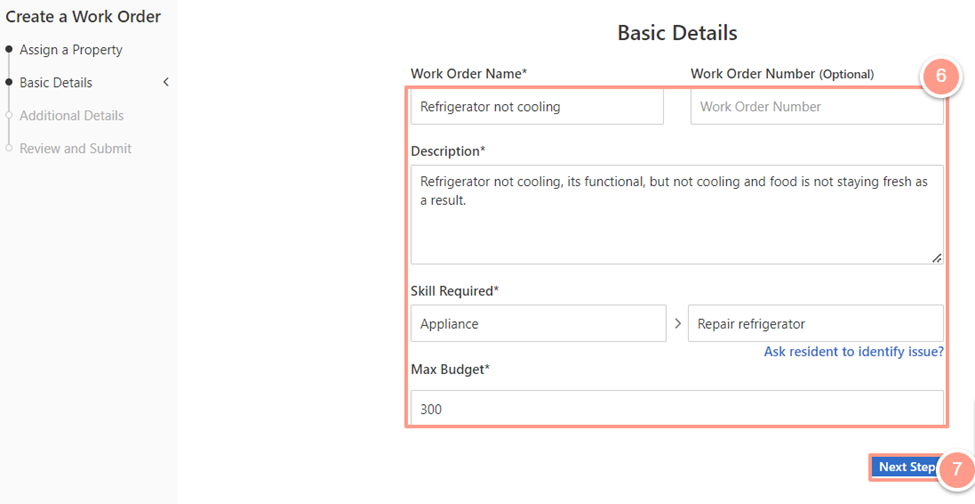
The following screen is the Basic Details or information about the work order. Once all information is supplied, click on Next Step.

  • Work Order Name: What the work order will be called.
  • Work Order Number: This is optional since the work order number is generated automatically unless the Property Manager prefers a unique order number. 
  • Description: The issue description is intended for the Service Provider to understand the problem and what needs to be fixed. 
  • Max Budget:  The budget estimate to solve the work order issue. 
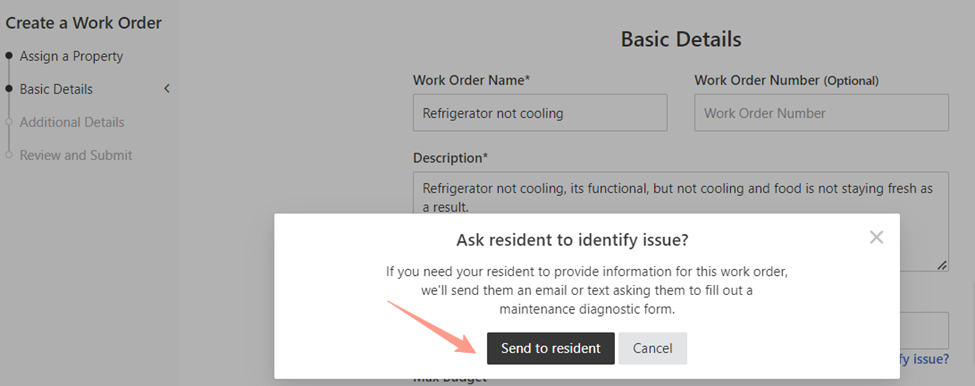
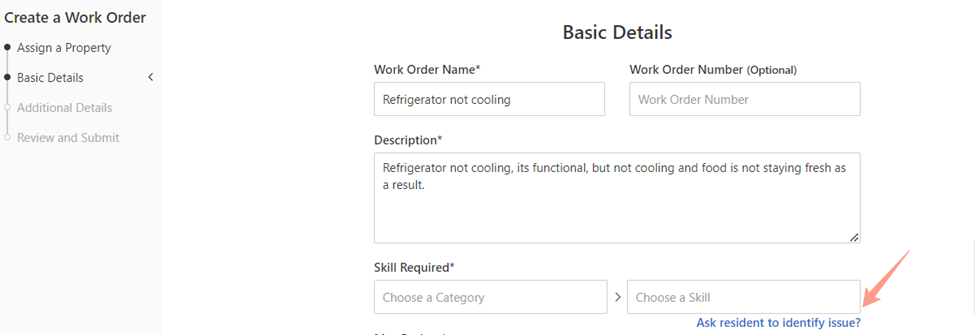
  • Skill Required: This can be populated if the Property Manager knows what skills are required to fix the problem.  Otherwise, click on Ask Resident to identify issue. This will automatically send a notification to the resident to complete the diagnostic flow. Once residents complete the information, the Latchel automation will kick in at the back end to start the work order resolution process. 
For this help guide, the property manager knows the skill required and was able to set up the max budget. 

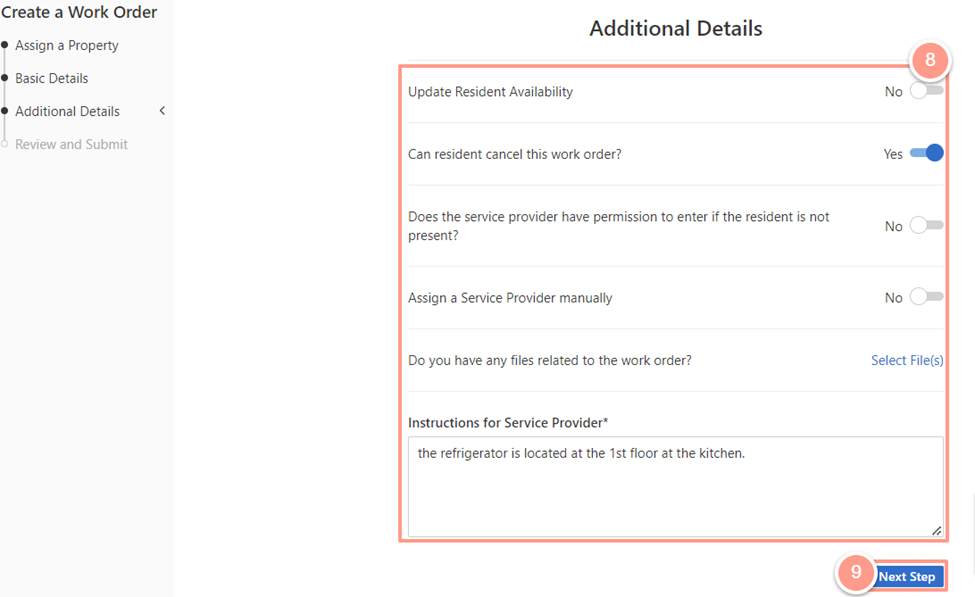
Following the Basic Details section is the Additional Details which include more information still related to the work order. Once information is populated, click on **Next Step. **

  • Update Resident Availability: If the property manager knows the time when the resident is available for a technician visit. 
  • Can resident cancel this work order: The property manager will allow or not allow the resident to cancel the work order. 
  • Does the service provider have permission to enter if the resident is not present: It is yes or no for access permission. 
  • Assign a Service Provider manually: If the property manager prefers to assign a service provider manually or go through an auto-assignment setup. 
  • Do you have any files related to the work order: This can be a photo or short video clip showing the problem. 
  • Instruction to Service Provider: Any other instruction for the Service Provider prior to or during the property visit. 
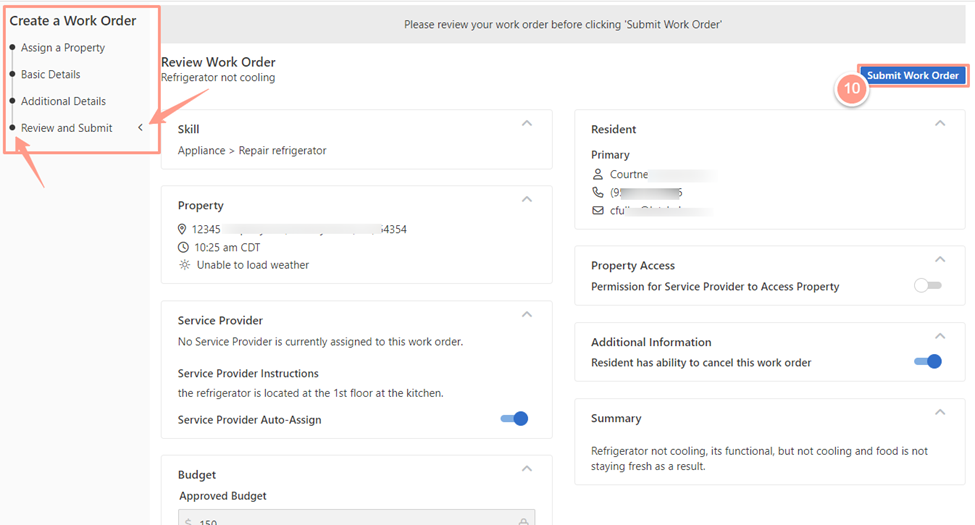
The next screen is the Review and Submit, where the Property Manager can review all the items, they put in. If modification is required, simply hover over the side tracker to go back to any section of the work order and start editing. The caret indicates what page the property manager is on while the black circle filled out means the step has been completed. 

If everything looks good, click on Submit Work Order. Then, it will proceed with corresponding automation to progress in resolving the work order. 

NOTE: _All residents are still required to go through the diagnostic workflow. This help guide is specific for Property Managers or Admins only. For residents, you may provide this help guide as a reference: _How can a Resident Submit a Maintenance Request.